
Review of PC Racing's Plastic Renew
(written by jshtx)
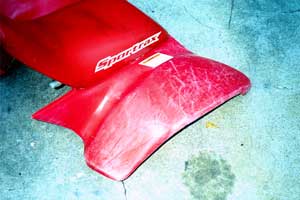
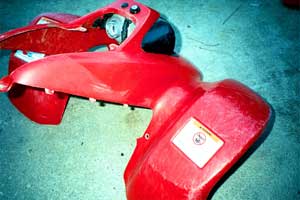
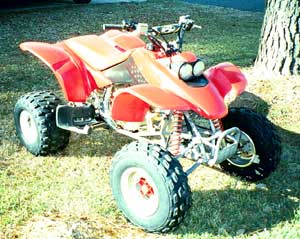
My son’s 01 400EX is in good shape, the plastic just looked bad. You can tell from the before pictures that it has been upside down a few times. I saw an add for this stuff and decided to give it a try. Worst case, I would have to buy new plastic anyway.
 I ordered my kit through my local Honda dealer for $19.95, and was told by the guy behind the counter “I heard that stuff is a lot of work”.
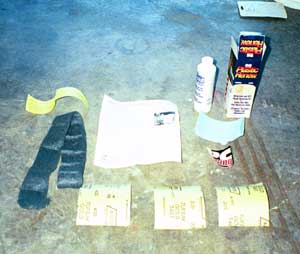
It came in and my first thought was “wow that is a small box”. Inside there was an 8oz. bottle of the chemical, three 3” X 4” squares of sandpaper, a blue paper towel like sheet, a 2” X 12” piece of steel wool and instructions. The advertisements I had read claimed there was enough to do two complete atv’s or four motorcycles, lets just say at this point I was a little skeptical. Oh and DON’T SHAKE THE BOTTLE, bubbles would be bad.
I ordered my kit through my local Honda dealer for $19.95, and was told by the guy behind the counter “I heard that stuff is a lot of work”.
It came in and my first thought was “wow that is a small box”. Inside there was an 8oz. bottle of the chemical, three 3” X 4” squares of sandpaper, a blue paper towel like sheet, a 2” X 12” piece of steel wool and instructions. The advertisements I had read claimed there was enough to do two complete atv’s or four motorcycles, lets just say at this point I was a little skeptical. Oh and DON’T SHAKE THE BOTTLE, bubbles would be bad.
Okay time to roll up the sleeves.
Step 1) Wet sand the scratched areas with the 200 grit paper. The instructions advise “leaving a few deeper scratches will not seriously effect the overall good finish”, yeah ok.
Step 2) Completely wet sand with 320 grit paper and then completely wet sand with the 400 grit paper. At this point the plastic looked bad, and I am really thinking about the cost of new plastic. I probably have an hour and a half into the job, and still quite a bit more work ahead of me. It is important to make sure that all the sanding marks left by the course paper are gone.
Step 3) Applying the chemical. Cut the paper towel into four smaller squares. Take one piece and fold it into a 2” square piece. Apply a small amount of the chemical to the towel and use it like a paintbrush. Only go in one direction and try not to overlap. Apply 4 coats letting it dry 3 or 4 minutes between each coat. This step took me about two hours.
Step 4) Buff the plastic with the steel wool until it feels “extremely smooth”. Then apply 2 or 3 more coats. Another hour or so invested into the project. The instructions say that it will get better every time you repeat step 4. I did it once.
I actually ended up with a little more than half a bottle of the chemical left. But I did purchase more sand paper and I used all of the steel wool and paper towel. If you bought extra supplies, like I did, you could definatly do two atv’s. Also the instructions suggest that you use latex gloves, unless you want the chemical on your skin for a few days,like I had, use them.
Now for the results. Was it a lot of work? Oh yeah. Am I happy with the results? Yes, the plastic sort of looks like it has been painted with a glossy red paint, but it defiantly looks much better. The finished pictures I have included don’t really do it justice. The first time we went ridding my son actually went out of his way to keep it from getting scratched. I watched as he worked very hard to put gas in without spilling any on his new looking plastic. And that pretty much sums it up.
The completed project!
|


