| 
Shark Kage Multi-Use Loading Ramp Review
Heavy Duty Folding Loading Ramp
Sarasota, FL (9/25/2014) - As with many businesses owners and inventors, entire companies and products are derived from trying to find a solution to a personal problem or as they say in business school a product was designed to “scratch their own itch.” Cort Smith did just that after loading up his motorcycle one day with a traditional aluminum ramp that slid out beneath him causing his heavy motorcycle to land on top of him. Once Smith picked himself and his motorcycle off the ground, he decided to invent his own loading ramp that would eventually be called the Shark Kage.
|
The Shark Kage Muli-Use Ramp has revolutionized the traditional loading ramp. Not only is the Shark Kage a loading ramp that doesn't slip off the tail gate, it can also be converted into a cargo box, tonto cover, bed extender, sunshade, and work bench
|
A lot of work went into designing and fabricating the Shark Kage ramp. From originally sketching out designs on cocktail napkins and sheets of paper, it took three years to design, prototype, fabricate and test the Shark Kage for it to become what it is now in the customers hands.
During those three years of fabrication however, Smith discovered he was inventing more than just an ATV ramp, the Shark Kage was becoming more of a multi-use ramp that could be folded into several configurations including a cargo box, tonto cover, bed extender, work table, and sun shade.
|
Shark Kage Multi-Use Ramp Video
|
From the early stages of prototyping, the ramps were built to full scale and took over a month just to create one prototype. To cut down the time of prototyping and while keeping the cost down, 3D models were made that only took one day to print. By 3D printing the prototypes, the engineering and articulation on how the ramp would fold was tested on a smaller scale before going into fabrication and production.
Smith began selling the Shark Kage to the masses with the help of Kickstarter, a crowd sourcing website that helps raise funds for new businesses. With the original goal of $42,000 on Kickstarter, Smith was able to surpass his Kickstarter goal of $42,000 and raised over $46,000.
|
Shark Kage Kickstarter Promo Video
|
In 2013, Shark Kage set up a booth at the famous SEMA show in Las Vegas and had great response. So much in fact, SEMA awarded them runner up in the Exterior Accessory New Product Award, as well as the 2013 Global Media award for introducing one of the best new products at this year’s SEMA show.
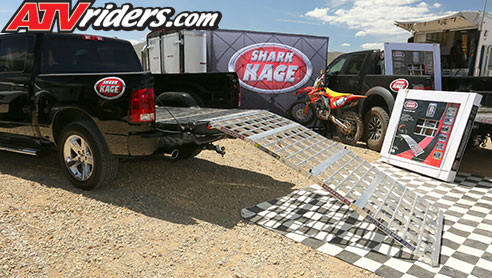
We had a chance to install our own Shark Kage on our new 2014 Chevy Silverado and put the Shark Kage to good use to see just for ourselves how well this multi-use ramp was build. When the Shark Kage arrived we were immediately surprised how heavy and well built the aluminum Shark Kage was. Weighing in a around 80lbs the Shark Kage isn’t your average flimsy loading ramps. Built with 6061 T6 Aluminum the ramp is very structurally sound.
The ramp comes fully assembled, but you do however have to install it on the your rear tailgate. Installation does require you to drill holes into the back of your tailgate to mount the Shark Bite flange that secures the Shark Kage to your truck. To be honest, we were kind of hesitant about putting holes into our brand-new ride, however the small holes are for the rivet nuts that are rated at 800lbs apiece that ensure a strong hold.
|
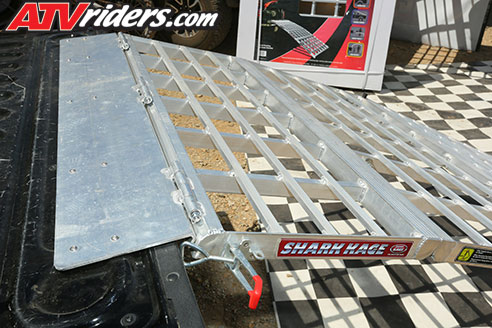
The Shark Kage stays in place by bolting the ramp directly to the tail gate
|
Shark Kage provides all the tools needed to install the ramp including wrenches, drill bits, rivet nut tool, and rivet nuts and bolts. The only tool that is not provided is a power drill to drill the holes. They also provide a paper template that you can lie on top of your tailgate that makes it easy to line up the holes where they need to be drilled.
Installation was pretty straightforward after we placed our marks where the holes needed to be drilled. Once the holes were drilled and the rivet nuts were put in place, it was time to bolt on the ramp. This was down by sliding three pins in place and righting up the nuts on each end.
|